How to Adjust a Food Photo Portion Size: A Simple Check-In Template
Use a short portion check-in to adjust a food-photo entry before saving it, without treating a camera estimate as a perfect measurement.
How to Adjust a Food Photo Portion Size: A Simple Check-In Template
To adjust a food photo portion size, compare the result with what you actually ate, change the serving count for the whole meal, then correct any missing or extra ingredients before you save. A photo can give you a useful starting point. Your portion check-in is what makes the journal match the meal you ate.
Use this quick check-in before saving:
What was on the plate: ______________________________
How much I ate: all / half / 2 servings / other: ____
What was missing or extra: __________________________
What is still uncertain: ____________________________
For example, if a photo result shows one chicken-and-rice bowl but you ate half, refine the meal as a half portion. If you ate two matching bowls, use the whole-meal serving stepper. If you ate the whole bowl but skipped the avocado, refine the meal to remove the avocado. Those are different changes, and treating them separately keeps the record understandable later.
Why adjust a food photo portion size before saving?
A meal photo does not show the amount you ate with perfect precision. It also cannot reliably show ingredients hidden under the food, cooking oil, or whether you returned for more. Image-based dietary assessment has known limitations in both food recognition and portion estimation, so it is sensible to review a result rather than accept it as a measurement. [A review in Nutrients] (https://pubmed.ncbi.nlm.nih.gov/33033394/) explains those limits in more detail.
Current food trackers make room for this review. MyFitnessPal's Meal Scan guide directs people to adjust the serving size or number of servings after scanning, and [Noom documents custom-meal serving and portion-size controls] (https://www.noom.com/support/faqs/using-the-app/logging-and-tracking/food-and-water/2025/10/how-to-create-and-log-custom-meals-with-serving-and-portion-size-tips/). The useful habit is not chasing a perfect number. It is making the few corrections you can support from the meal itself.
What is the difference between changing a serving and refining a meal?
Use the serving count when the photographed meal is right but the amount is wrong. Use a refinement when the amount is right but an ingredient or detail is wrong.
| If this happened | Change to make | Example |
|---|---|---|
| You ate half of the pictured meal | Refine the meal description | "Half a portion" |
| You ate two matching bowls | Adjust the serving count | One bowl becomes 2 bowls |
| The meal included less of one visible item | Refine the meal description | "Half the rice" |
| An ingredient was not on your plate | Refine the meal description | "No cheese" |
| You are unsure about oil or a sauce | Keep that uncertainty visible | "Sauce amount unknown" |
Do not use a larger serving count to fix a single ingredient that was not there. It scales every item in the result together. Likewise, do not invent an exact gram amount just because a photo looks neat. A clear estimate is more useful than false precision.
How do you review a food photo portion size step by step?
Use this four-part check while the meal is still easy to remember.
- Check the result against the plate. Look for the main foods, obvious additions, and obvious omissions.
- Set the whole-meal amount. Decide whether you had less than one photographed portion, one portion, or more than one.
- Correct the details. Add a concise change for a missing item, an extra, or a different visible quantity.
- Leave uncertainty honest. If you do not know a recipe, oil amount, or second helping, note that rather than reverse-engineering a precise value.
Here is a worked check-in for a shared lunch:
What was on the plate: chicken, rice, roasted vegetables, avocado
How much I ate: about half the bowl
What was missing or extra: no avocado; added a small yogurt sauce
What is still uncertain: amount of oil used for the vegetables
First refine the result to describe the half portion, remove the avocado, and add the sauce. The oil remains an honest unknown. This is not a nutrition prescription or a claim that the final log is exact. It is a simple way to preserve what you know without pretending to know what you do not.
How does PeakBFF handle a reviewed food-photo result?
In PeakBFF, take or add a meal photo, review the itemized calories and macros, then use the serving stepper when you need more than one whole photographed meal. Tap Refine to describe a correction in plain language, such as "no cheese," "half a portion," or "half the rice," before saving. You can also set the entry date if you are logging a meal later.
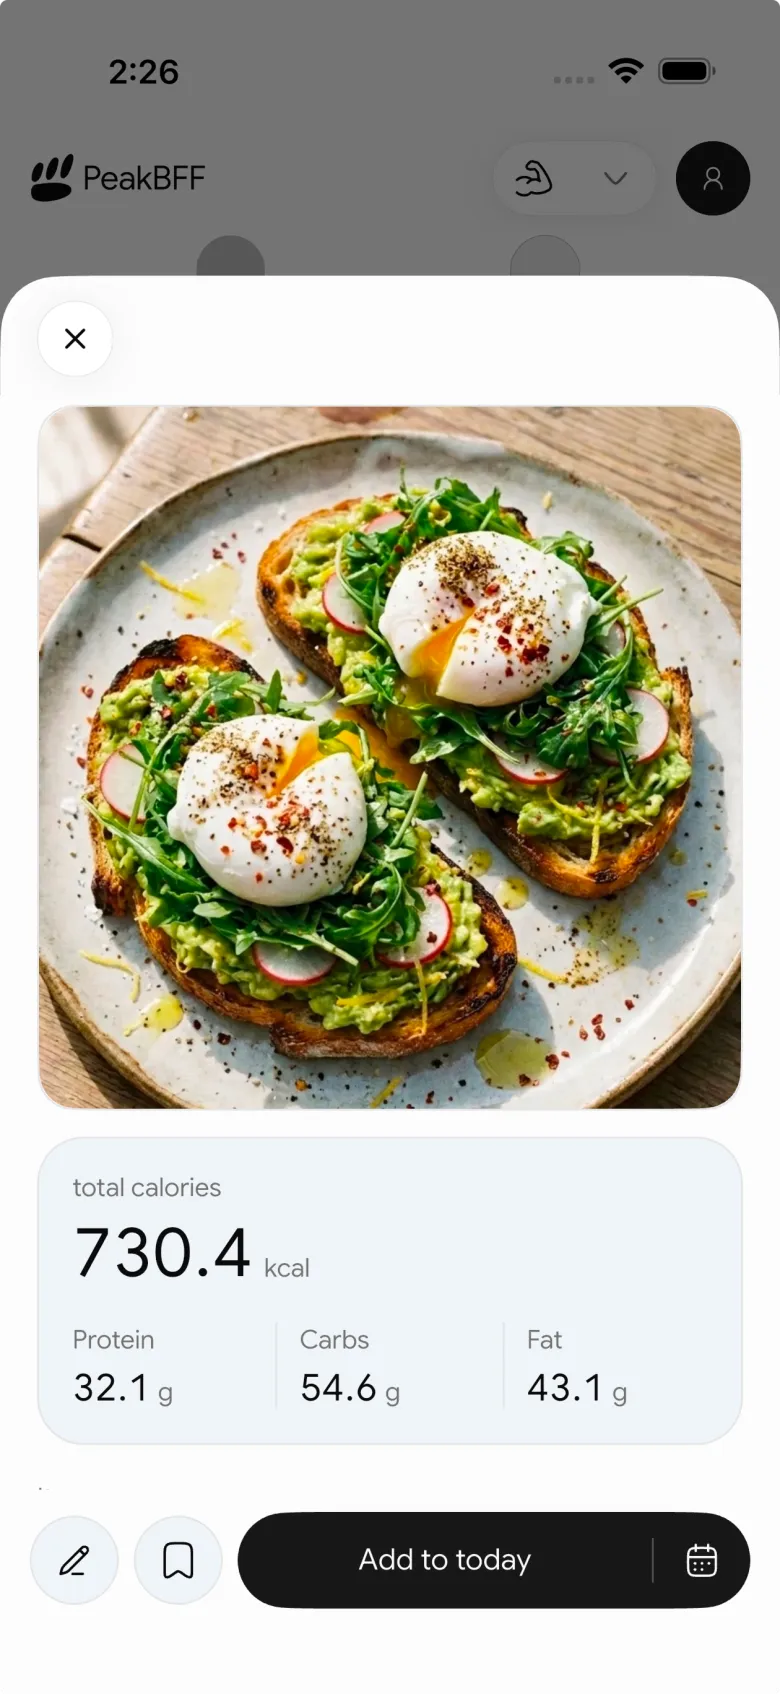
This workflow is useful because the whole-meal serving step and the refinement are separate. PeakBFF does not turn a photo into a weighed meal, and it should not replace a package label when you have one. For a packaged item with no barcode match, use our [nutrition-label fallback guide] (/blog/en/how-to-scan-nutrition-label-when-barcode-not-found). For a meal you photographed but did not log at the table, the [camera-roll meal template] (/blog/en/how-to-log-meal-later-from-photo) is the complementary workflow.
A practical portion check-in habit
The best time to adjust is before you save, while you can still answer three plain questions: Did I eat all of it? Was something missing or extra? What do I still not know? That keeps a food photo helpful without asking it to do more than a photo can do.
If you want the review step beside your workout log, water, and nutrition history, PeakBFF keeps them in one app. Download it for iPhone or Android.
More from PeakBFF
More app comparisons, fitness guides, and product notes.
Best AI Physique Transformation App With Workout Tracking (2026)
Compare AI physique-transformation preview apps for motivation, photo boundaries, and the workout record you use after the preview.
How to Save a Workout as a Template After Training
Turn a session that worked into a reusable workout template without confusing completed results with your next plan.
Best Beginner Gym App With Starter Programs and Form Cues (2026)
Compare beginner gym apps for choosing a starter program, checking exercise form cues, and logging the sets you actually complete.
How to Track Home and Gym Versions of the Same Exercise
Use a simple split-or-combine checklist to keep home and gym exercise variations clear in your workout history.
How to Log a Weigh-In in a Gym App: A Simple History Checklist
Log a weigh-in with a repeatable routine, a clear calendar day, and a simple history review that keeps your gym records useful.
How to Choose a Starter Workout Program: A 3-Question Template
Choose a starter workout program with a simple goal, schedule, and equipment template, plus a verified PeakBFF setup flow.